WebUI
The config tree in the web UI provides a graphical interface to applying custom settings to EdgeOS, including dynamic DNS.
Click the “Config Tree” tab across the top of the page.
Drill down inside the tree structure on the left side: service > dns > dynamic > interface
Add a new interface entry, using the name of the interface for your WAN connection. Example: eth0. Click “Update List”.
Drill down into the newly added interface entry on the left, and then the service sub entry.
Click the “Add” button to create a new service entry, and call it custom-cloudflare, and click “Update List”.
Drill down into the newly added custom-cloudflare entry on the left.
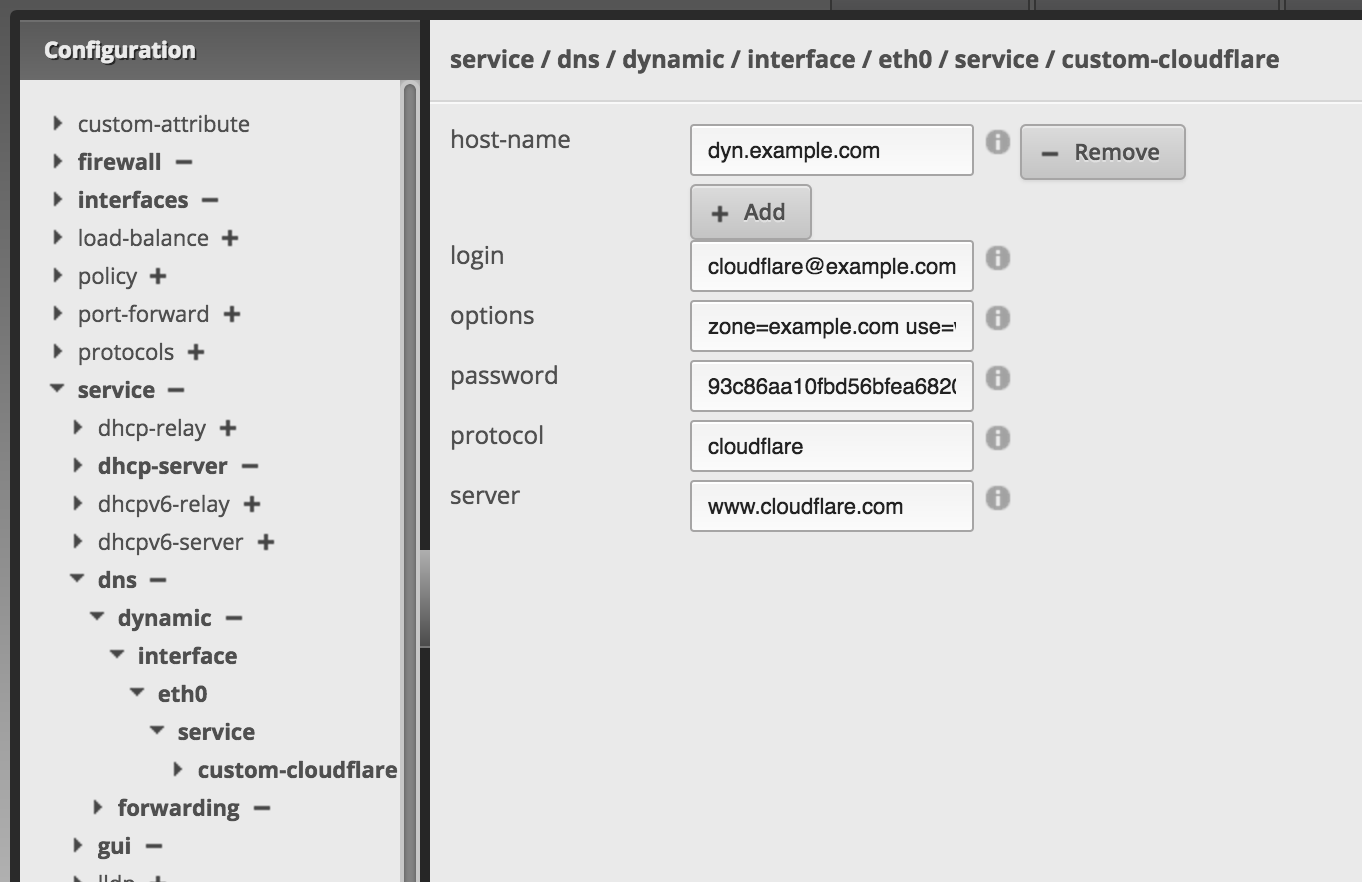
Click “Add” next to host-name and provide your dynamic DNS subdomain. Example: dyn.example.com.
Fill out the rest of the form fields as follows:
- login: Your CloudFlare username. Example:
[email protected] - options: Update the following line with your domain, and paste it into the field:
zone=example.com - password: Your CloudFlare API key
- protocol:
cloudflare - server:
api.cloudflare.com/client/v4/
Click “Preview” at the bottom of the screen, and click “Apply” when prompted. Navigate back to the custom-cloudflare service on the left. Your screen should look similar to this:

When you check the A record in your CloudFlare account, it may not be updated with your IP address. If that’s the case, you will need to force your router to do an update. Go to the Services tab at the top of the screen, then choose the DNS sub tab, and click “Force Update” at the bottom of the screen.